The Revolution Will Be 3D Printed
Printable, modifiable and shareable open-source labware is offering users a new way to acquire and customize traditionally expensive laboratory equipment
At a Glance
- Open-source labware offers equipment solutions for labs that can’t afford – or whose needs are not met by – standard systems
- FlyPi is one such tool, a modular microscopy system that can be customized to fit the requirements of its users
- Not only are users invited to download and print their own FlyPi systems, but they’re welcome to create and share their own unique modifications as well
- The open labware revolution is on the rise – all that remains is to get as many people as possible involved
The single greatest limiting factor for a new, underfunded, or resource-limited laboratory is equipment acquisition. Most laboratory technology is expensive, and some pieces can be difficult to locate or transport to more remote areas. So how can a lab get itself up-and-running, or upgrade its equipment, without sufficient money or access? That’s where the open labware revolution comes into play.
Open-source lab equipment is freely available – not just for 3D printing by potential users, but also for further development. Pathologists can download and print the designs they need, creating modular systems to suit their specific needs – and if the system lacks a particular function, they’re welcome to design it themselves, print it, and share it online to help others with the same needs. A significant part of the laboratory at the University of Sussex runs on technologies we have designed, printed and assembled ourselves. It’s my hope that by sharing our experiences with the FlyPi modular microscopy system, as well as our other tools, we’ll be able to encourage others to join us on our quest for affordable, accessible, editable equipment.
Building a better microscope
FlyPi is not our only creation; we have actually built several pieces of equipment – pipettes, micromanipulators, and even a pico-injector. But some form of microscope is at the core of most biomedical labs and, as such, it’s an obvious starting point. Nowadays, imaging equipment like a powerful charge-coupled device (CCD) chip is routinely incorporated into everyday items such as mobile phones, webcams, and all manner of surveillance and home automation hardware. So if you have a suitable set of lenses to hand, a makeshift digital microscope is never far out of reach. For example, if you break the lens out of a cheap laser pointer and tape it over a mobile phone camera, you already have a pretty powerful microscope in your pocket.
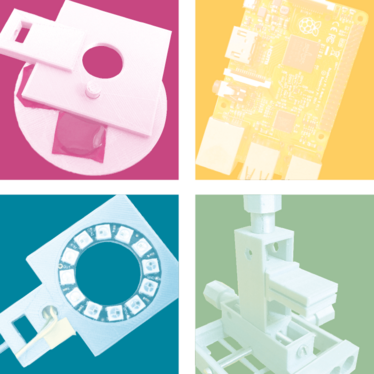
As it turned out, one popular adjustable-focus camera module for the Raspberry Pi platform is already a microscope, though it was not originally intended as one. Simply screw the objective lens all the way out, and the optics align to bring tiny objects just in front of the lens into focus on the CCD chip. We stumbled across this when using the camera system in an attempt to film some fruit flies in the lab, so we just integrated the feature into our microscope design.
Why were we filming fruit flies? We originally intended FlyPi to be a behavioral monitoring system for small, genetically tractable model organisms – including Drosophila, nematode worms and zebrafish. In these species, it is fairly easy to selectively express specific proteins in specific neurons that can then be controlled with light (optogenetics) or heat (thermogenetics). This is a core technique in modern neuroscience; it lets you study the functions of neurons and circuits in a noninvasive manner. It’s also a fairly user-friendly technique in that you don’t need a huge amount of light or heat to trigger these proteins. A suitable LED or hot plate will do the trick. So we built a simple camera system to which we added some basic controls for controlling LEDs and a Peltier (heating/cooling) element. Of course, the fact that our system can now also work at high zoom opens up a number of additional possibilities; for instance, with some low-cost sheets of colored plastic like those used in theater lighting, we can shape the spectra of lights reaching a sample or the camera path to enable fluorescence imaging.
Why FlyPi?
We think the power of FlyPi’s design comes from its modular nature and broad range of possible use cases. Some people may use it just to magnify samples; others may appreciate the fluorescence imaging option; still others may wish to use it as a behavioral chamber for neurogenetics experiments. If you only want one or two of these functions, you only need to assemble one or two of the underlying modules – and if you change your mind later on, you can simply swap them out or add more. At its core, FlyPi is just a little camera with lights that can be flexibly arranged to suit the user’s needs.
Getting Involved in Open Labware
Tom Baden and André Maia Chagas
Why is open labware important?
TB: Affordability and universal access to laboratories and institutes of learning around the world are key considerations in open labware. The community effort matters, too. If you build something useful and put it online – free to use and modify – then others will soon pick it up, improve it, and re-share it. It’s a very satisfying process that results in greater benefit for everyone.
AMC: Open labware fits quite nicely with all the other efforts to make academic science more reliable, robust and accessible. As more and more initiatives push for open-access publications, open sharing of study designs, and preregistration of protocols, soon the only barrier stopping anyone from being an active part of science will be the lack of appropriate tools. That’s where open-source hardware comes in. It allows more people to actively participate in science by coming up with testable ideas and developing experiments to prove or disprove them. Not only that, but by being open, the communities involved also become collaborators. We can build on one another’s progress, so everyone wins!
Take the FlyPi as an example. Anyone can use it as a starting point for a better microscope design. They “win” by not starting from scratch, and we “win” by having more people working to improve our original design.
A final point to consider: many new tools for science are developed inside institutions funded by public investment, so it is only fair and ethical that they are released under open-source licenses. That way, the people who paid for the technologies can start to reap their benefits faster.
How can others get involved in the open labware movement?
TB: Pick your favorite design and build it! You will soon realize how easy it is not to just follow other people’s instructions, but to modify them to better suit your needs. Most people get hooked at first contact. For example, I ask every new student in my lab to build something, and so far everyone has latched onto it with ease. The result? Most things in the lab that can be printed (rather than bought) are – which saves a huge amount of money.
AMC: I completely agree; building things that are already available is a great way to start! It might seem a bit intimidating in the beginning, because we are used to being passive consumers of technology rather than active makers. The designs can seem complex, with a lot of parts users have never seen before, using concepts that most people last saw in high school. But there are a lot of tutorials online for small projects that introduce newcomers gently, as well as a very active community of people who excel at replying to questions and assuaging doubts. Additionally, once you start learning basic circuitry, you’ll realize that there is a lot of repetition in laboratory equipment. The electronic circuits necessary to build an orbital shaker, a centrifuge, or the heating and cooling element of a thermocycler are all pretty much the same! Once you learn how to build one of those things, the next one is exponentially easier.
In terms of peak resolution, the system will certainly be superseded by most commercial solutions, and even a number of alternative open microscope designs. For example, the 3D printed WaterScope, in combination with a commercial objective, provides much crisper images, albeit at a somewhat higher price. Where FlyPi outperforms its rivals is in flexibility. If you want to, you can point the camera at a tree, zoom out, and do a time-lapse over several days. Or you can zoom all the way in, point it at a blood smear, and count macrophages. Ironically, colleagues often come to use our system to take pictures for which their commercial microscopes are too good – like snapshots of a whole mouse brain at high resolution. A mouse brain is too big for a 4X objective combined with 10X oculars (the lowest typically available on a compound microscope), so if you use commercial equipment, you actually end up having to take multiple pictures and stitch them together with specialized software.
That’s not to say that you can’t take a high-resolution image with FlyPi, though. If you want better resolution without changing systems, you can simply take a commercial objective of any power and mount FlyPi’s CCD chip above it to capitalize on the better optics. After all, there is nothing special about commercial solutions. You can even stick FlyPi down the ocular of a commercial system to take some snapshots if you don’t have a microscope camera to hand. In our laboratory, we sometimes do this when demonstrating dissections so that students can follow along on a screen. We have even used it as an improvised gel imager by placing the ultraviolet LED beneath the stage and the camera above – works like a charm! In time, we hope that users will come up with all kinds of interesting applications that we have not thought of – and, most importantly, improve the designs to their own requirements and then re-publish them.
Think of the system as a pretty flexible digital camera system with additional control circuits and filters for light and heat. What could that be used for if you really exploit your scientific creativity? To keep an experimental animal at a suitable temperature? As a visual stimulator for vision experiments? To monitor and manipulate how colonies of organisms behave over long periods of time? Perhaps embarrassingly, I sometimes just use it as a remote webcam to monitor my 3D printer! I guess the only limit to FlyPi’s applications is the limit of its users’ imaginations. If you have a FlyPi sitting idle in the lab, you will soon find its use, and rarely for its intended purpose! We tend to have a few spare ones around when we run neuroscience training courses in Africa (1) and it never takes long before students and instructors ask if there are any more, because they are all in use!
Your very own FlyPi
All of our designs are available on GitHub, and we also put the best ones on Thingiverse and Open-Labware.net so that they are freely accessible to anyone who wishes to use them. If people wish to share their own modifications to the system, the simplest way is to generate a fork to the existing GitHub repository (github.com/amchagas/FlyPi) and upload them. If the changes mostly concern 3D printed parts, it may also be worth putting them on Thingiverse and tagging the original design (thingiverse.com/thing:905172) so that it’s easy for others to find the modifications. Of course, if users are interested, we are certainly happy to include substantive improvements directly to the core repositories as appropriate. Just write us an email!
Is FlyPi right for everyone? I think for diagnostic purposes, it’s all about the size of the thing that needs to be resolved. Using the cheap plastic objective lens that comes with the system, we have a point-spread function of about 10 µm. Resolving objects substantially smaller than this is likely to be difficult – if not impossible – unless you use a higher-quality objective, which is a fairly easy modification. What does that mean in the clinic? Counting red blood cells or identifying types of white blood cells is fairly easy with the basic system. Identifying malaria parasites within red blood cells, on the other hand, is just beyond the limit of its abilities – you’ll need to add a better lens for that.
The rest of the lab
FlyPi is a great – and very low-cost – addition to most laboratories, but you don’t have to stop at just one piece of “homebrew” technology. Many standard pieces of lab equipment can already be home-built. Centrifuges, shakers, incubators and even thermocyclers have been on the makeshift market for a long time. In our own lab, we usually build “new” things if we identify an obvious need, but cannot find an existing open-source solution. If you run into the same problem, it is always worth checking a few standard sites: Thingiverse (2), Instructables (3), Hackaday (4), and the National Institutes of Health 3D Print Exchange (5). To help new users along a bit, we also curate a collection of designs that are well-documented and seem to work (6). Take a look at what’s available and consider how it might fit into your current laboratory setup. We look forward to welcoming you to the open labware revolution!
Where can people find more open labware resources?
Additional open-source hardware repositories
Repositories for 3D models
Thingiverse
Youmagine
NIH 3D Print Exchange
Open-access journals for open-source hardware
HardwareX
Journal of Open Hardware
Websites discussing open-source initiatives
Labrigger
Open Neuroscience
Open Plant Science
Open Plant
Open Labware
Open Lab Tools
CIAA Project
Biomaker
Online communities and associations:
FlyPi’s next step:
- “Teaching and Research in Natural Sciences for Development in Africa” (2017). Available at: www.TReNDinAfrica.org. Accessed July 20, 2017.
- “Thingiverse – Digital Designs for Physical Objects” (2017). Available at: www.thingiverse.com. Accessed July 20, 2017.
- “Instructables – How to make anything” (2017). Available at: www.instructables.com. Accessed July 20, 2017.
- “Hackaday | Fresh hacks every day” (2017). Available at: hackaday.com. Accessed July 20, 2017.
- National Institutes of Health, “NIH 3D Print Exchange” (2017). Available at: 3dprint.nih.gov. Accessed July 20, 2017.
- PLoS, “Open Source Toolkit” (2017). Available at: channels.plos.org/open-source-toolkit. Accessed July 20, 2017.
Tom Baden is Principal Investigator and Senior Lecturer in Neuroscience at the University of Sussex, UK.

